Top Labelling Tips From The Teacher
Brought to you by Nuffnang and Brother
Organising Chaos, With Labels That Stick.
I am part of that special breed of human that is both a mother of small children and a school teacher. Although sometimes this is a curse (oh gosh it is hard to stand back and not rush in and help), it is also a blessing as I am well equipped to handle all of those back to school preparations.
This year I will have two children at school FULL TIME (cue the tears now). I jokingly tell everyone that’s why I had another baby, as I couldn’t handle the thought of having no children at home every day. #jokingnotjoking This means double the everything: book lists, uniforms and, of course, labels. Having the perfect labels that stick is the easiest way to organize the back to school chaos.
I think all teachers have a tendency to be OCD organisers and labellers. I was labeling everything way before I had children! So here are my…
TOP LABELLING TIPS FROM THE TEACHER
TIP 1. LABEL EVERYTHING!

When I say everything, I mean EVERYTHING. Double check
- Text books and dictionaries
- Stationery (EVERY pencil, marker, crayon, sharpener, eraser, ruler)
- Calculators
- Uniforms
- Hats
- Shoes and socks
- Library bags,
- Drink bottles
- Lunch boxes (container and lid)
- Lunch bags
- Musical instruments
- Sports gear
- UNDERWEAR! I have a bit of a joke each year when it comes to children going to school swimming lessons. If I find underwear and it is labeled I can discretely return it to the owner otherwise, I will have to hold them up in front of the class! Oh the horror!
TIP 2. WHY LABEL EVERYTHING?
It gets returned. After spending a small fortune on school gear I can guarantee that something will go missing in the first week of school. If you haven’t labeled it, there is literally no chance it will ever be returned. Money. Down. The. Drain. At least if it is labeled there is a chance someone honest will ensure it finds its way home.
Stop the arguments. Imagine this. 25 Children. All with near identical belongings. Nothing like pack up time when a child swears the red pencil with the bite marks on the end is THEIRS! If it’s labeled, no argument!
Encourage Responsibility. This also encourages your children to be responsible for their own belongings. This is particularly important for those littlies who have come from Kindergarten with communal resources. Having YOUR name on an item makes you responsible for it. If it is found on the floor there is no denying who should be putting it away!
Now here are a few hints that I have learnt with two children at school. Different items require different information on their labels. Boy, do I have some experience in helping kids find their lost belongings!
TIP 3 USE PICTURES OR ICONS
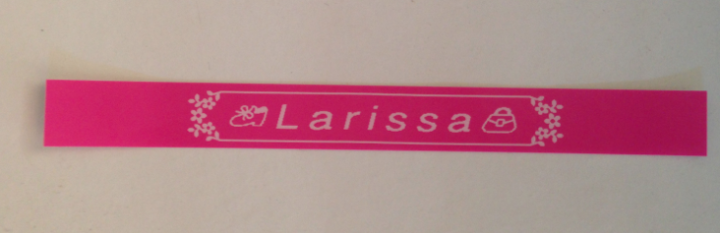
Pick one picture or icon for your child and use it on all their belongings. This is particularly helpful for non-readers or beginning readers as it helps them identify their own belongings, when they have trouble reading their name.
TIP 4: BE SNEAKY
Hats – These are the most frequently lost, expensive item (wait for it…Little Miss A’s hat costs $95!!!) These get labeled with her full name and my phone number. With a couple hundred identical hats in the school a first name only is never going to help it find its way home. I add my phone number as generally, I also label the inside and under the band (an inconspicuous spot) just incase someone else tries to claim it as their own! Sometimes a sneaky label pays off. This goes for school uniforms as well.
TIP 5: FULL NAMES
Have you got any idea how many children in a school possibly share the same first name? Where possible use your child’s full name. If it is an item that may possibly be passed down to another family member a last name should do the trick. Also use upper and lower case letters for your beginning reader as many have difficulty identifying their name when it is all in capital letters…
TIP 6: CONTACT DETAILS
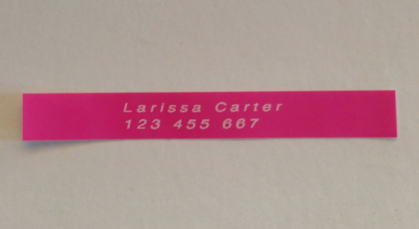
If it is expensive or carted to and from school, I add my contact details. Think hats, bags and instruments. This way if it’s left on a bus, or in the pick up zone, the finder has a way of letting you know where it is! I always make sure mine and my husband’s mobile numbers are on our children’s school bags in case of emergencies.
So how do you do all of this without breaking the bank? Simple, a label maker!
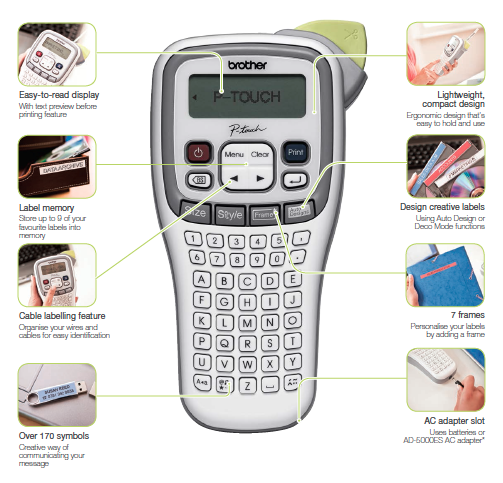
At only $25 from Officeworks, it’s affordable, versatile and creates durable labels that will actually stick. The laminated tape withstands EVERYTHING! The most durable labels on the market, they can be used both indoors and outdoors and are sun, germ, water and temperature resistant.
With 178 Symbols, 7 Frames and coloured tape, it’s easy to create pretty and personalised labels. You can also create two lines of text, perfect for your child’s name on the top and phone number on the bottom. We went with pink laminated tape for Little Miss A and laminated satin gold for Master O (they came in a three pack together with white tape)
Another brilliant addition is the iron on tape – perfect for hats, socks and school uniforms. You have no idea how hard it has been finding labels that stick to socks! I use my label maker a lot so being able to use it with an AC adaptor saves me a whole heap of money on batteries.
Naturally because I love my label maker so much, I want to share the love.
You could win your very own Brother PT-H105 Labeller! Just use Rafflecopter below to let me know;
What would you label with the Brother PT-H105 Labeller and why?