An Organised Wardrobe…Part One
This organising project has been our biggest so far, as it involved two rooms! I have now organised the wardrobes in both Master O and Little Miss A’s Bedrooms. Our wardrobes have long been a disaster areas piled with clothes that don’t fit, are disorganised and basically jammed in cupboards and drawers. I used some “Pinspiration” to motivate me to get started and provide me with some great ideas about what I wanted to accomplish with these spaces.
1. Use the space under childrens hanging clothes. Childrens clothes are short and this leaves a lot of space under clothes, a great spot for some drawers, baskets or even adding another clothes rail.
2. Little items are best stored in baskets or containers.
3. Some items are best stored on shelves, if you don’t have shelves the hanging organisers are perfect.
4. Coathangers of the same colour make the wardrobe look less cluttered. As does a huge cull of what your children wear! None of these wardrobes are overflowing with clothes!
5. Neatly folded clothes. Costs you nothing and looks amazingly neat and tidy.
I managed to do all five! The proof is in the pictures.

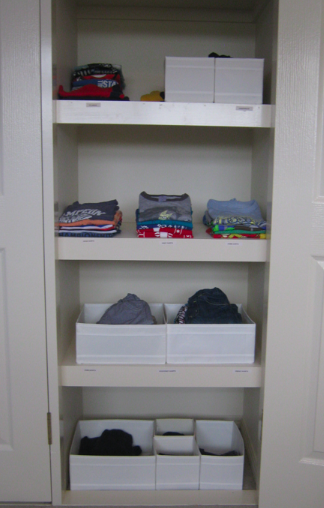
So this is number 2, 3 and 5. I have made the most of the shelves in Master O’s built in wardrobe by sorintg like items onto each shelf. (Number 3 – Check!)
Top shelf: Lto R Pyjamas, Singlets (in container) Underwear, socks and Hats all in containers. Behind them are a few long sleeved shirt as it can still be cool here in the mornings! These containers from Ikea were perfect for all those little bits and pieces that are so hard to keep neat! (Number 2 – Check!)
Middle shelf: Shirts. They do a left to right migration. They start off as good shirts, progress to Kindy Shirts and end their lives as home shirts! You can see on this shelf that I employed a little secret weapon to achieve neatly folded clothes! More about that later! (Number 5- Check!)
Next Shelf: Shorts. Two simple piles in containers. Good Shorts, Kindy/Home Shorts. I kept them in the same order so he knows what goes with what!
Bottom Shelf: Lto R A winter tracksuit, Transformers Costume (yes it gets its very own space and mud patch clothes. Thes are the final starw clothes great for digging in the mud, painting, colour water play etc.

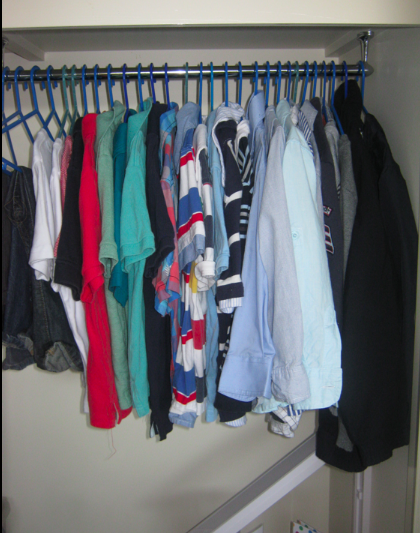
I did a massive cull on this side of the wardrobe. Hanging up are Master O’s good clothes or special occasion outfits and jeans. (Number 4 – check!) Can you see what is just peaking out underneath?

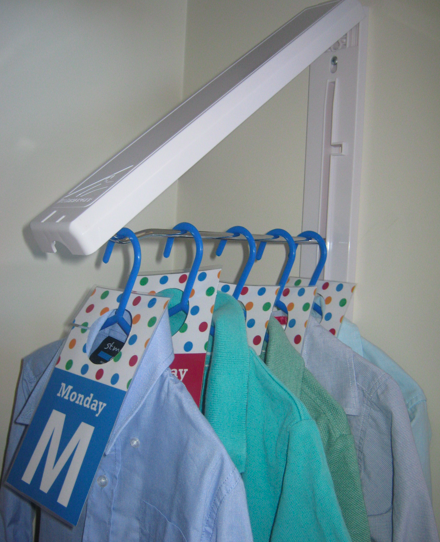
I have showed you this one before but I love it so much he got a second look in. This is where master O’s outfits for the week go. We are getting prepared for 5 days of button up shirts next year! This is a great use of the space under his hanging clothes. (Number 1 ticked off the list!) You can read more about this project HERE
I can’t believe how much more space I have, how much neater it looks and how it has made getting dressed a far less stressful and tantrum throwing experience!
Of course there is more to come! A whole other bedroom in fact!
What’s working or maybe not working in your wardrobes?